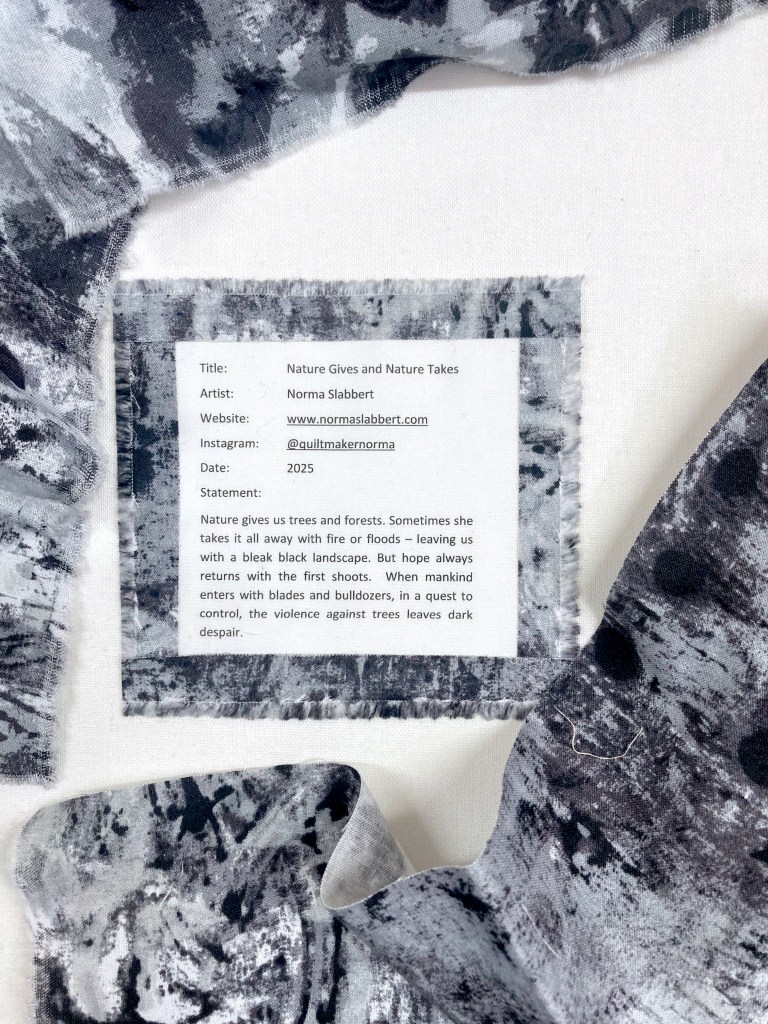
I use selvedges to frame the labels on the back of my quilts
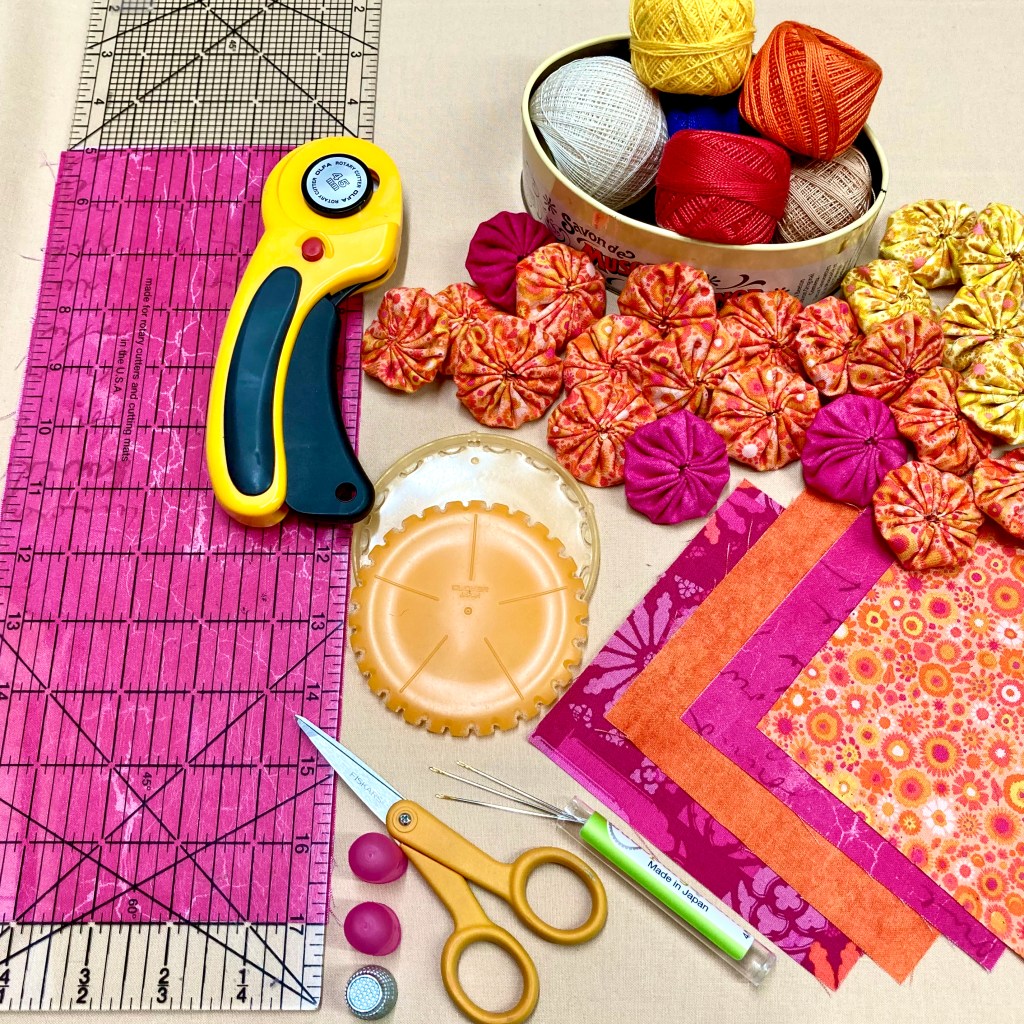
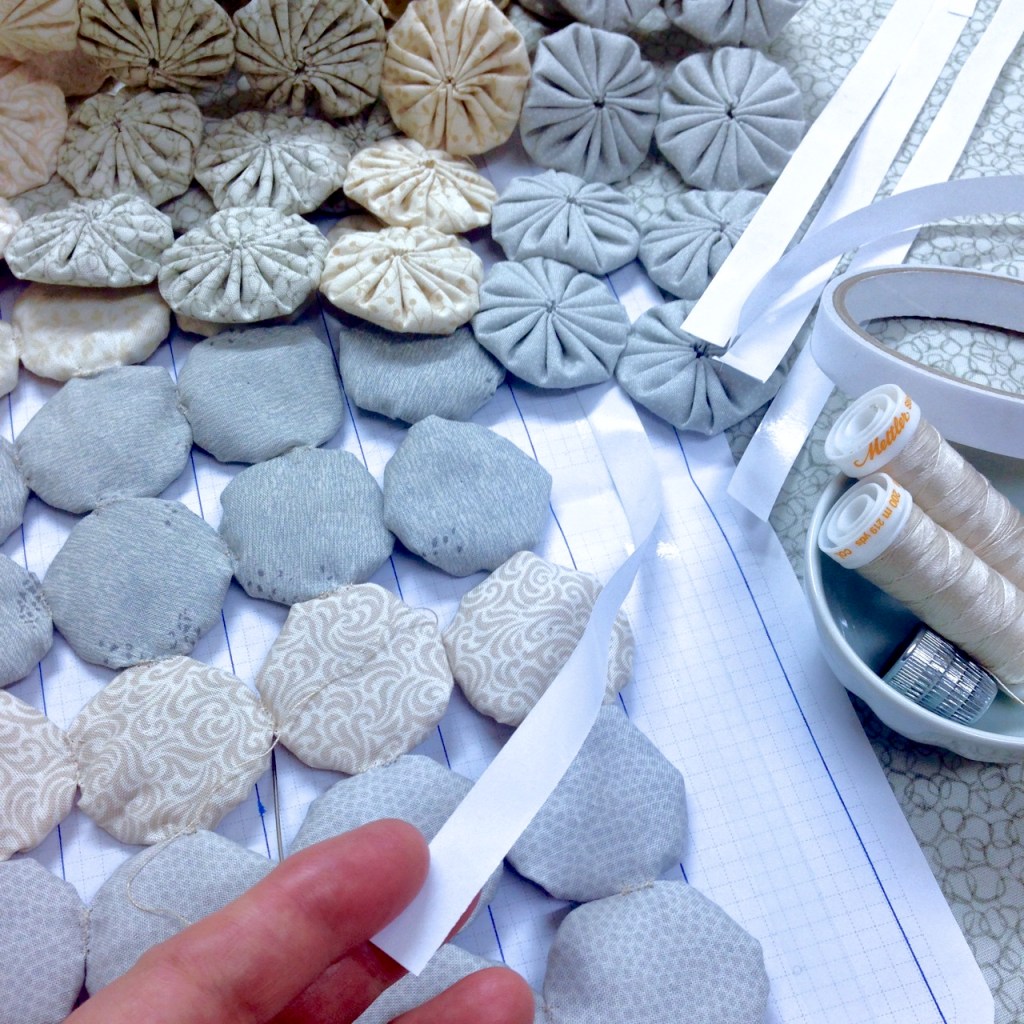
The tools I use when making Suffolk Puffs or Yo-Yos
Cotton or silk fabric
A 5″ ruler for cutting the squares – to give the squares a full fat feel
Roller cutter
A plastic Yo-Yo maker
Strong embroidery thread
Number 3 Milliners needle
Thimble and scissor
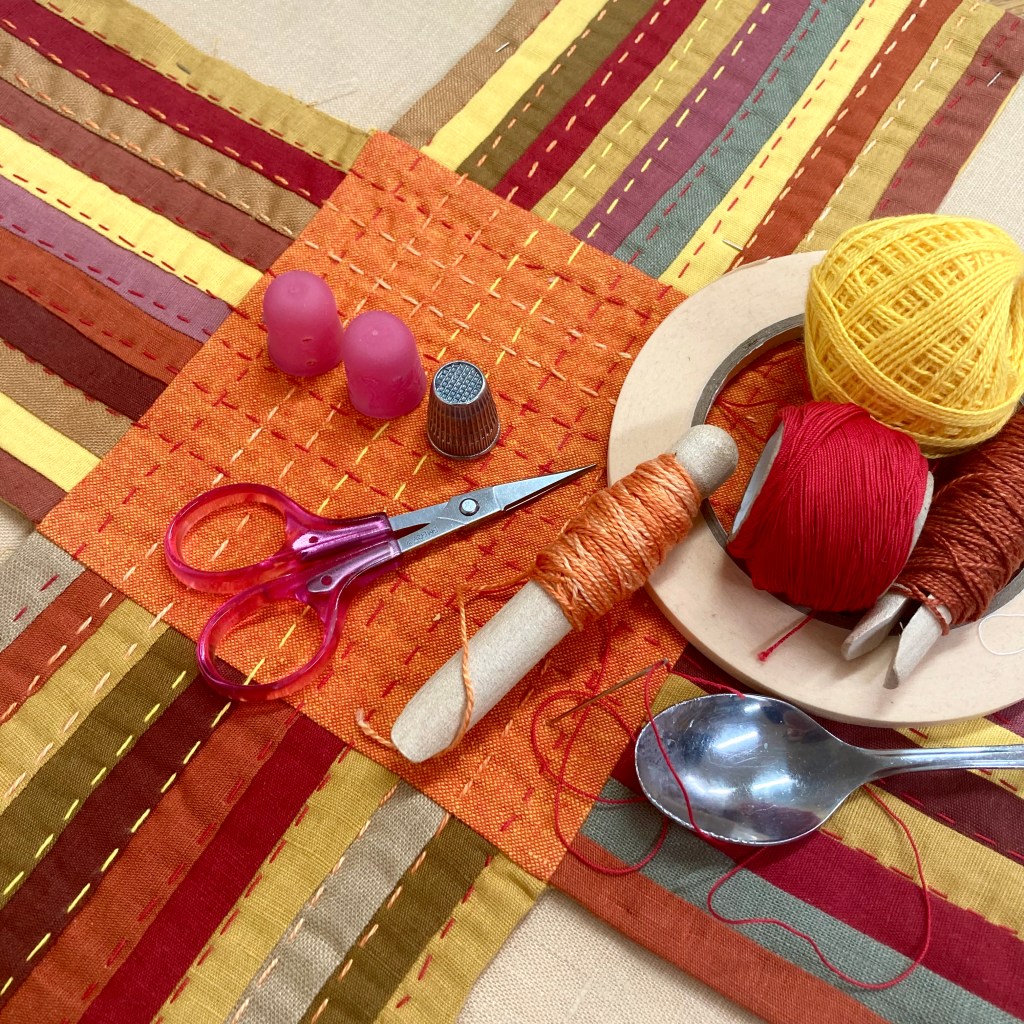
My best tools when I do big stitch quilting
Masking tape – to keep lines straight
Flexible rubber thimbles
Thimble for forth finger
Perle cotton thread
Sharp needle with large eye
Teaspoon – to pick up the needlepoint
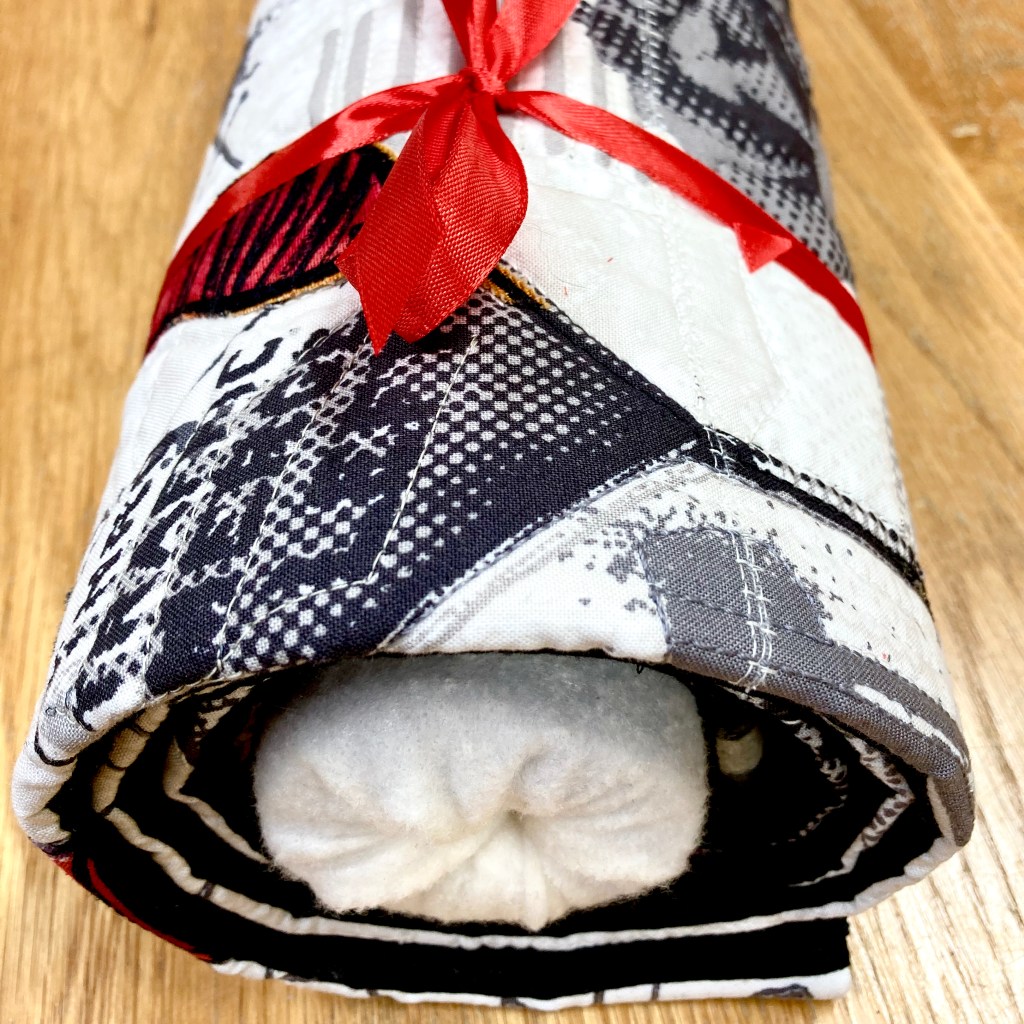
The way I prepare and pack my quilts for posting or courier – to an exhibition
I cover a pool noodle with left over batting.
I keep all my small pieces of left over batting for this purpose and stitch them together to make noodle covers.
Roll the quilt around the pool noodle with right side facing out and tie with ribbons. (Recycled ribbons from gifts.)
Cover the rolled quilt with layers of bubble wrap and a bag that would keep it safe and dry.
Some kind of sturdy tube would be the safest way to send the wrapped quilt, but the weight makes it more expensive.
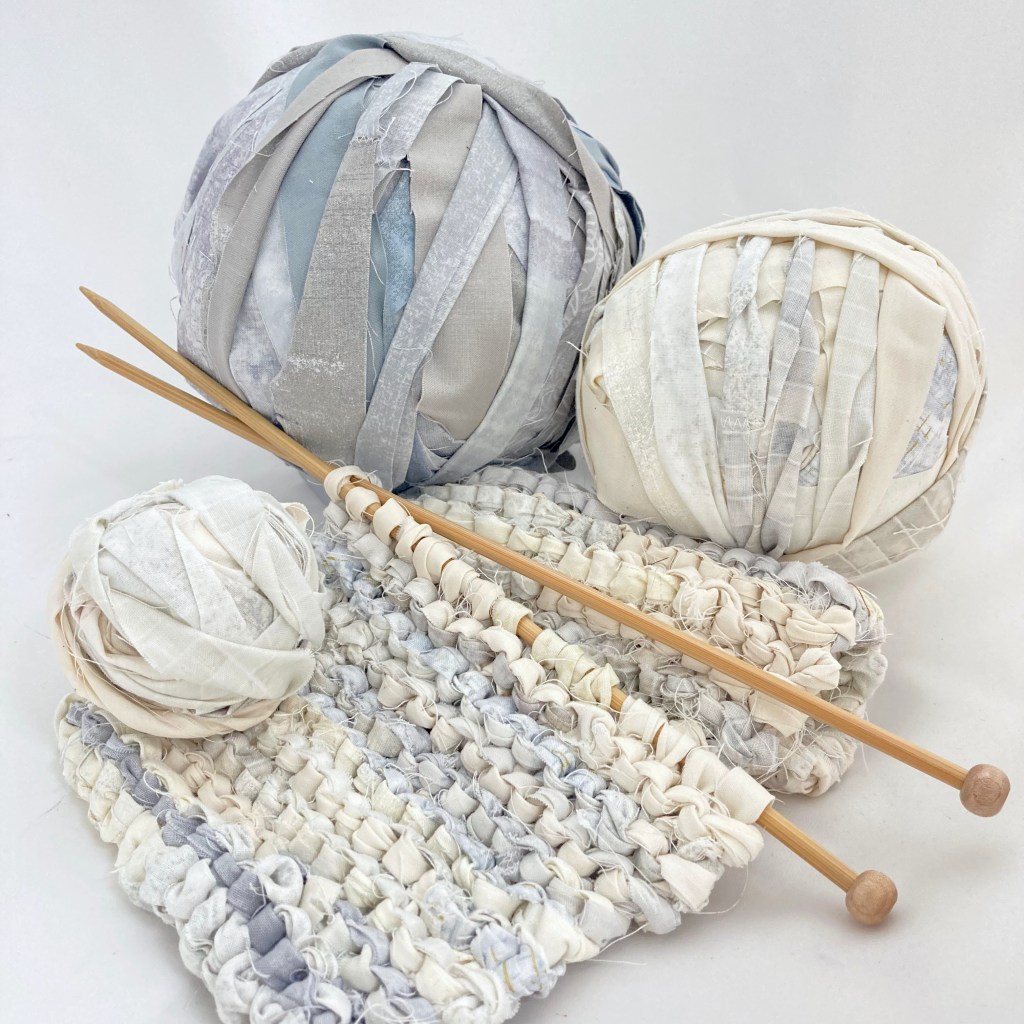
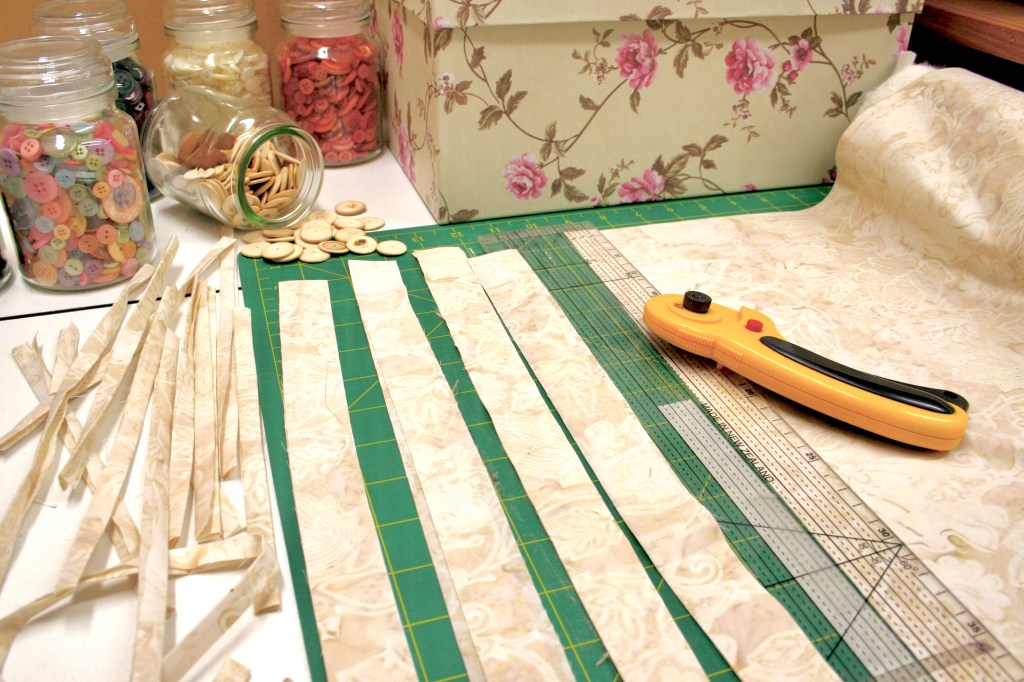
One way of using left over strips of fabric
I use all my left over Log Cabin strips to knit something new. Hard on the hands, but if you keep the tension loose, it is easier to knit.
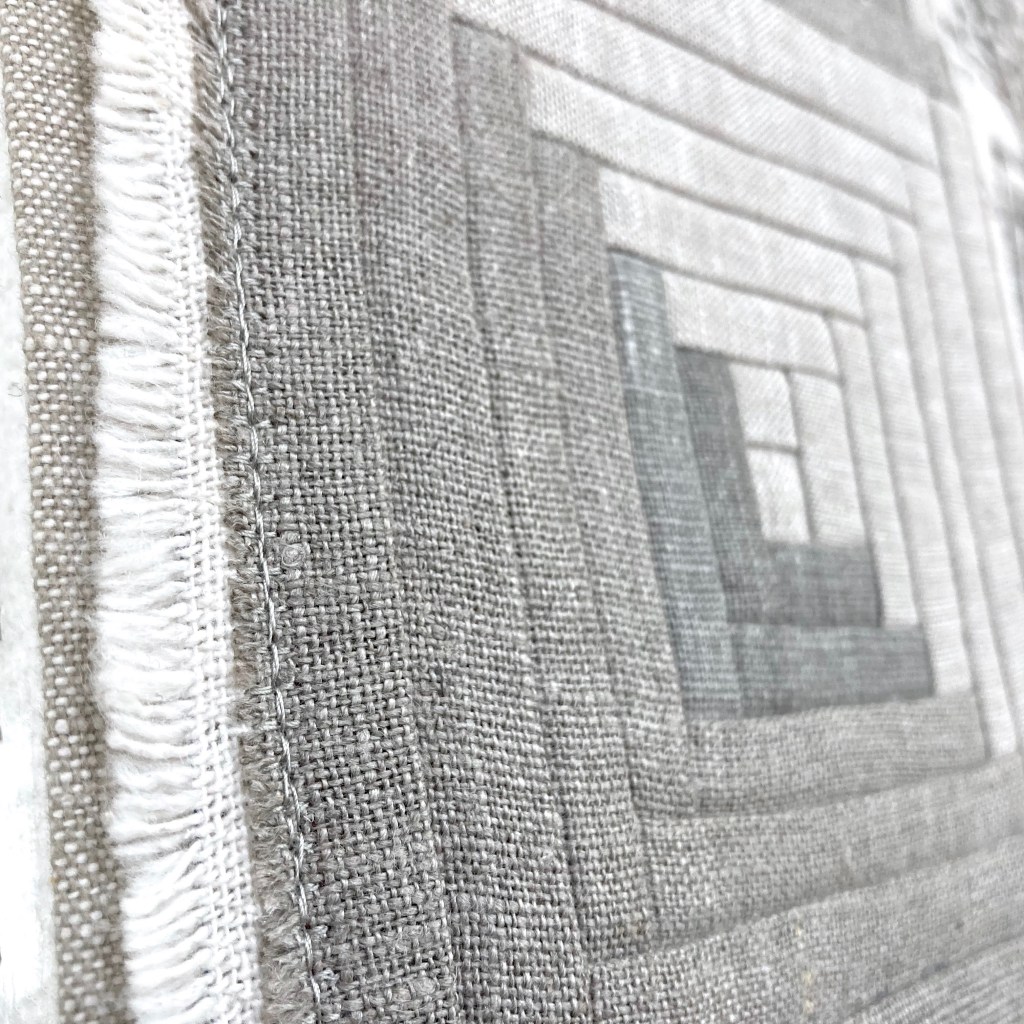
Using selvedge’s
I like to use a selvedge to finish some of my quilts – instead of a binding.
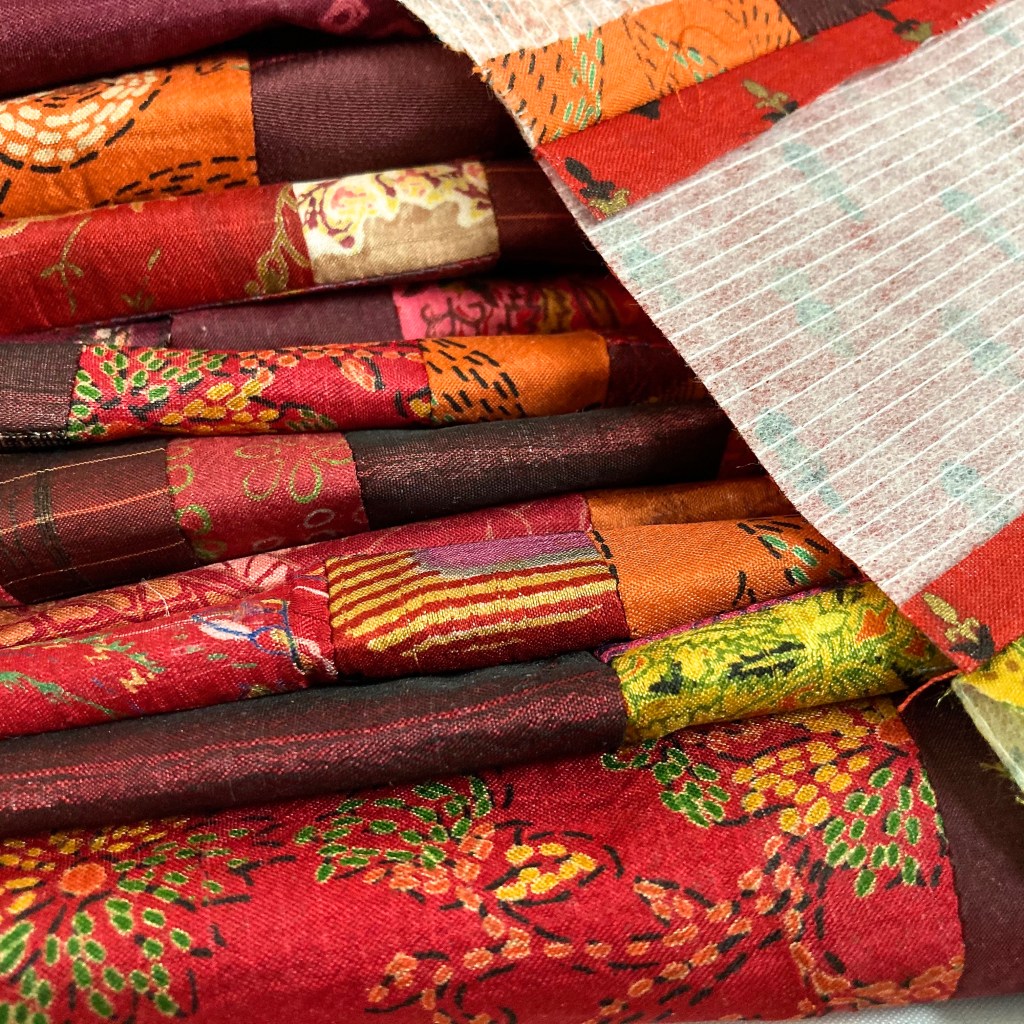
Using every scrap of recycled silk
I save and use every little scrap of recycled silk fabric in my stash.
Some strips are less than 1cm wide.
When I work with slippery silk fabrics, I fuse a light stabiliser to the back of the strips – to make stitching easier.
I even use the silk selvedge’s – to frame the blocks.
The Log Cabin blocks are Ideal for framing, gifts, small quilts, bags, or just to touch.
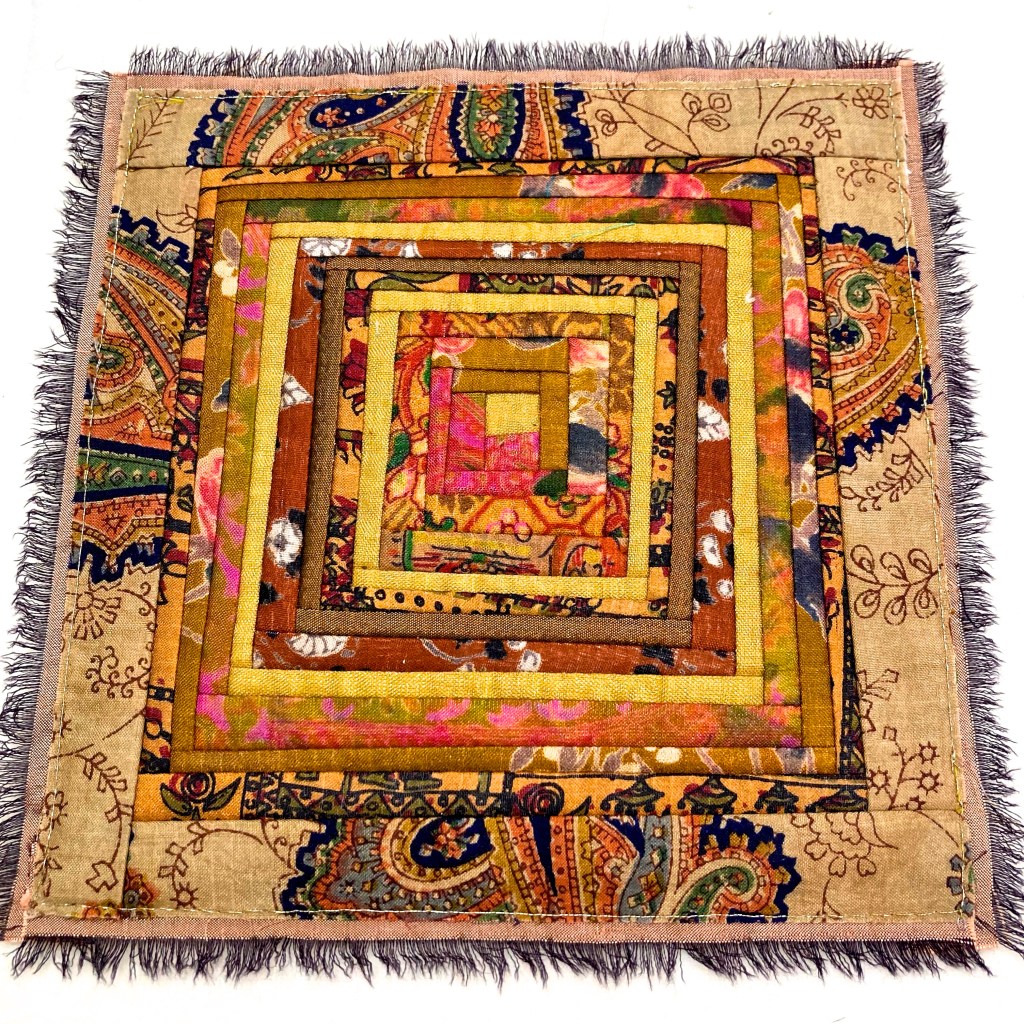
Log Cabin
When I make log cabin blocks, I cut the strips of fabric along the lengthwise grain – parallel to the selvege. It has less stretch and prevents wonky logs.
I only cut off one selvage from a new fabric – so I know what side to use when I cut the strips.
Log cabin asks for a variety of fabrics and I am often tempted to buy just 25cm, which is not economical when I cut along the selvage.
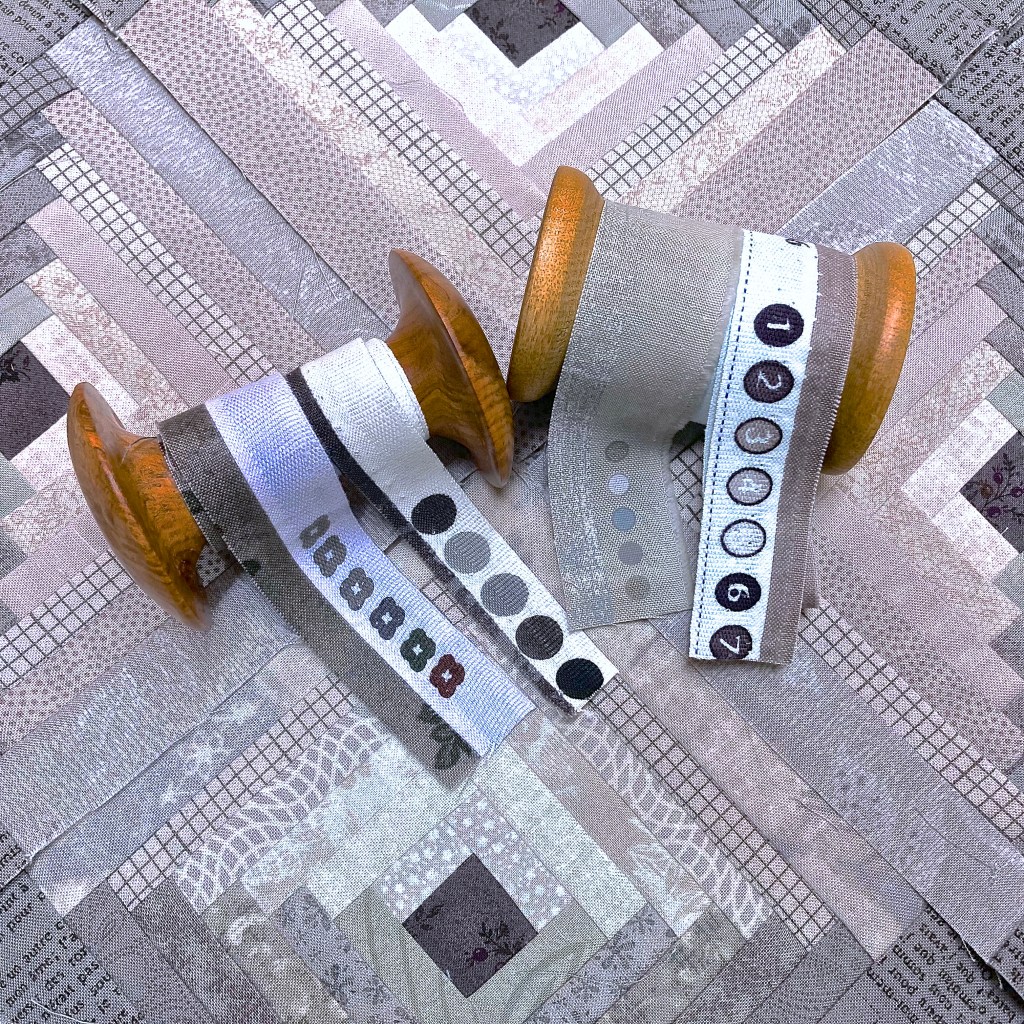
I enjoy studying the selvage and reading the delicious names – to find the fabric designer’s intention or spirit.
The little colour dots on the selvage often guide me to match or contrast colours.
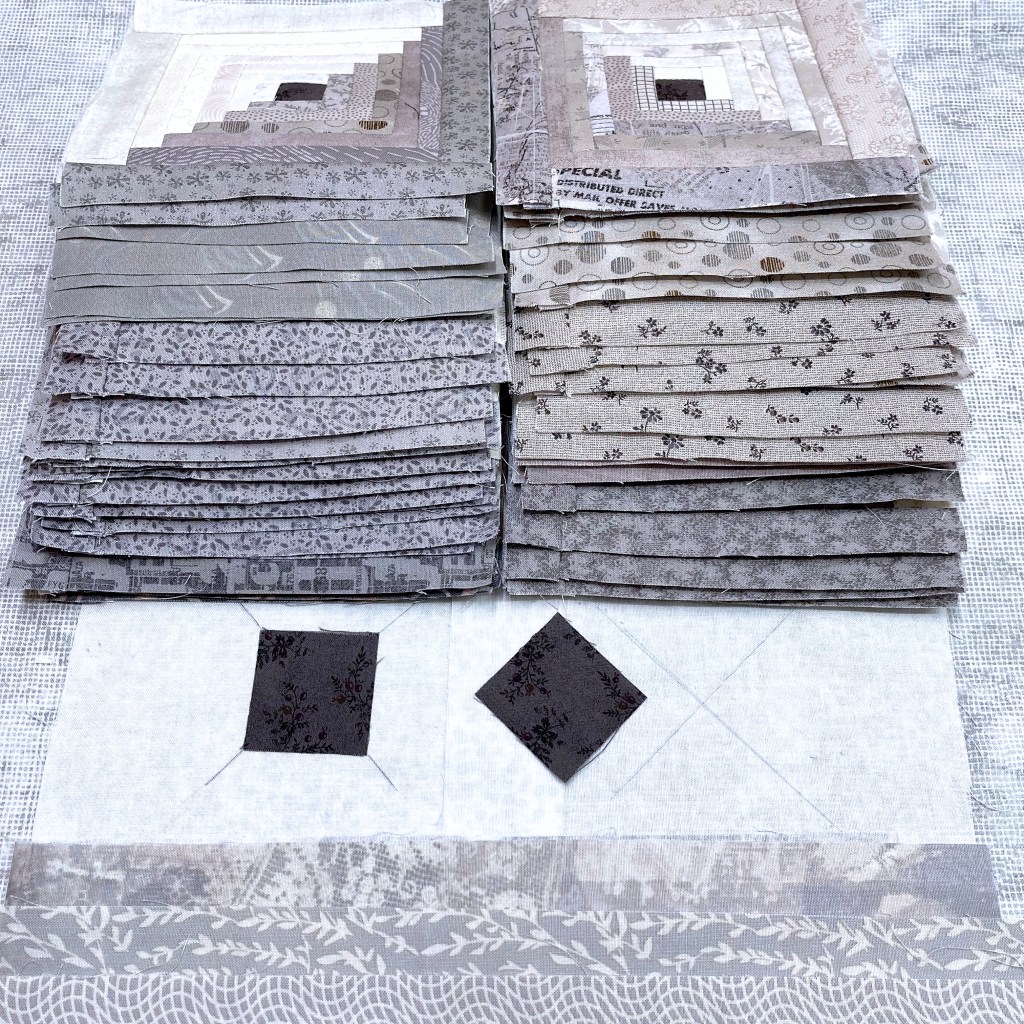
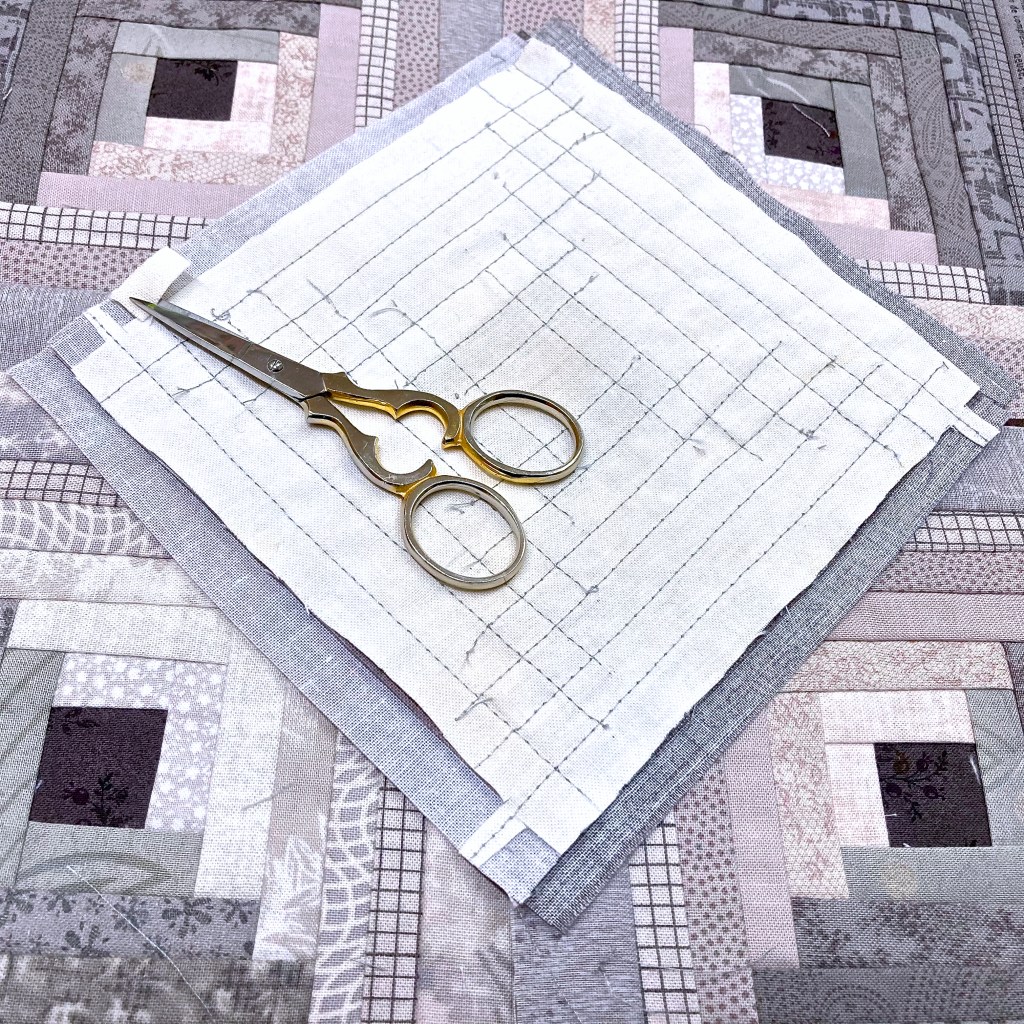
Log Cabin – centre square
I like to fuse the centre square of a log cabin block to a base fabric square – to prevent distortion when I start to stitch the strips.
I measure and draw a cross in the middle of the base fabric and then line up the corners of the centre square, before fusing it.
Log Cabin – base fabric
I do not paper piece Log Cabin squares, but use a base fabric.
I start by cutting the base fabric a bit larger than the planned size of the finished block.
When I finish stitching the strips, I cut away the extra base fabric – to reduce the bulk before I join the blocks.
A base fabric prevents the strips or logs to be wonky.
If you trim the blocks before you pin them to the design board, it gives a cleaner look while you design the layout of the quilt.
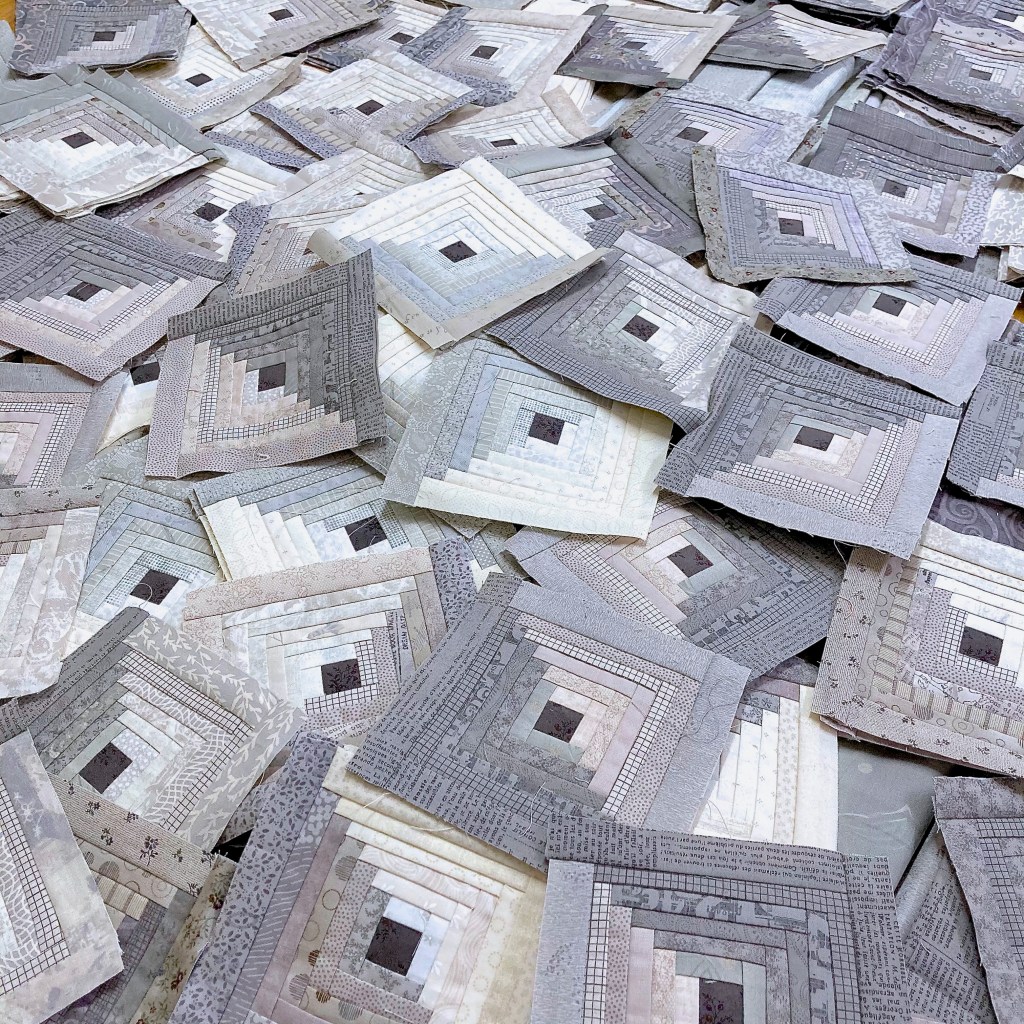
Log Cabin – process
When I begin a new Log Cabin, I do not plan the design before I start.
I choose a hero colour and make a lot of blocks in different combinations of textures, tints, and tones – before I go near the design board.
When I have a big stack of trimmed blocks, I spread them out on my large quilt table and only then do I start designing the quilt on my design board.
I play around with the blocks and try out many combinations until I find harmony and stillness.
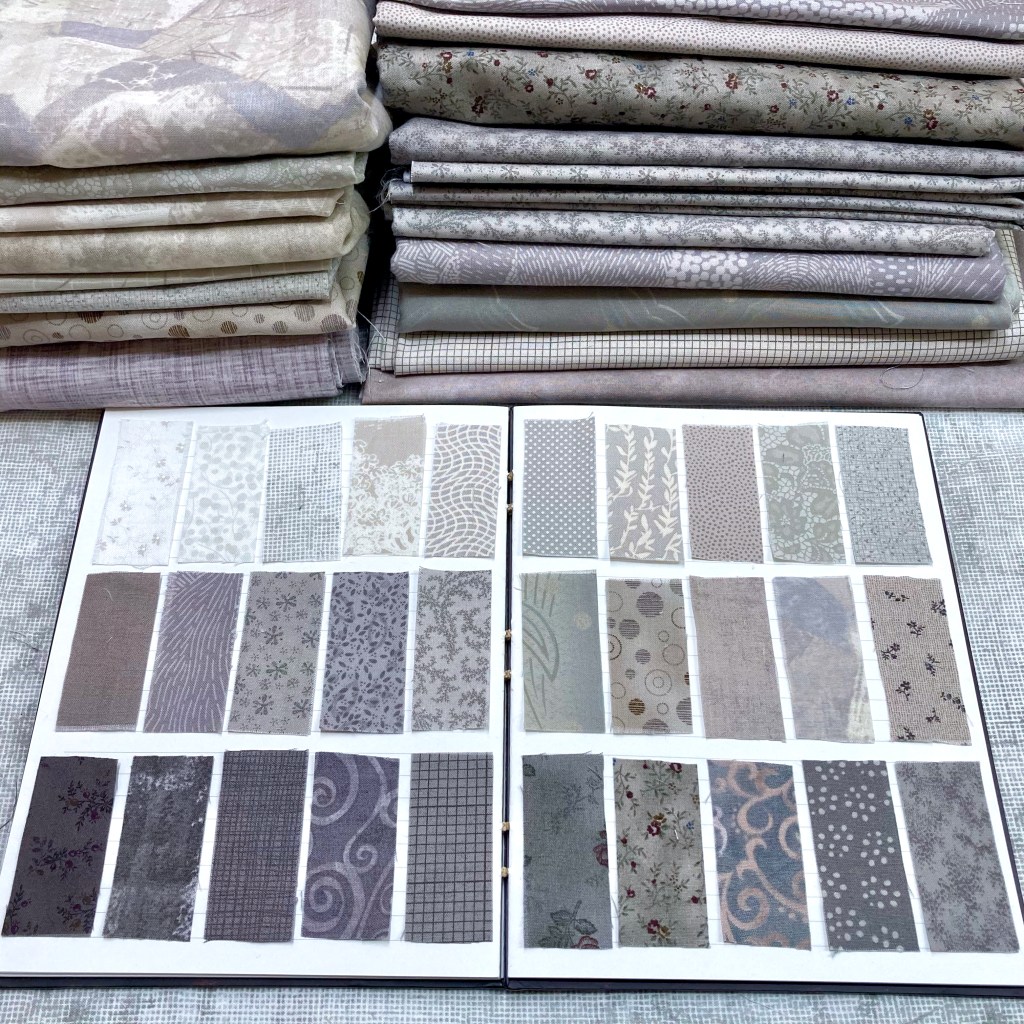
Recording the process
When I work towards an exhibition, I record all the fabrics that I select for a quilt by cutting and pasting small swatches in my snippet book.
It is a handy shopping guide when I need more of the same.
Keeping a swatch record for a project is especially handy when I need to document the process for an exhibition.
And who knows, someday, it may even be a snapshot of the fabrics of our time and place.
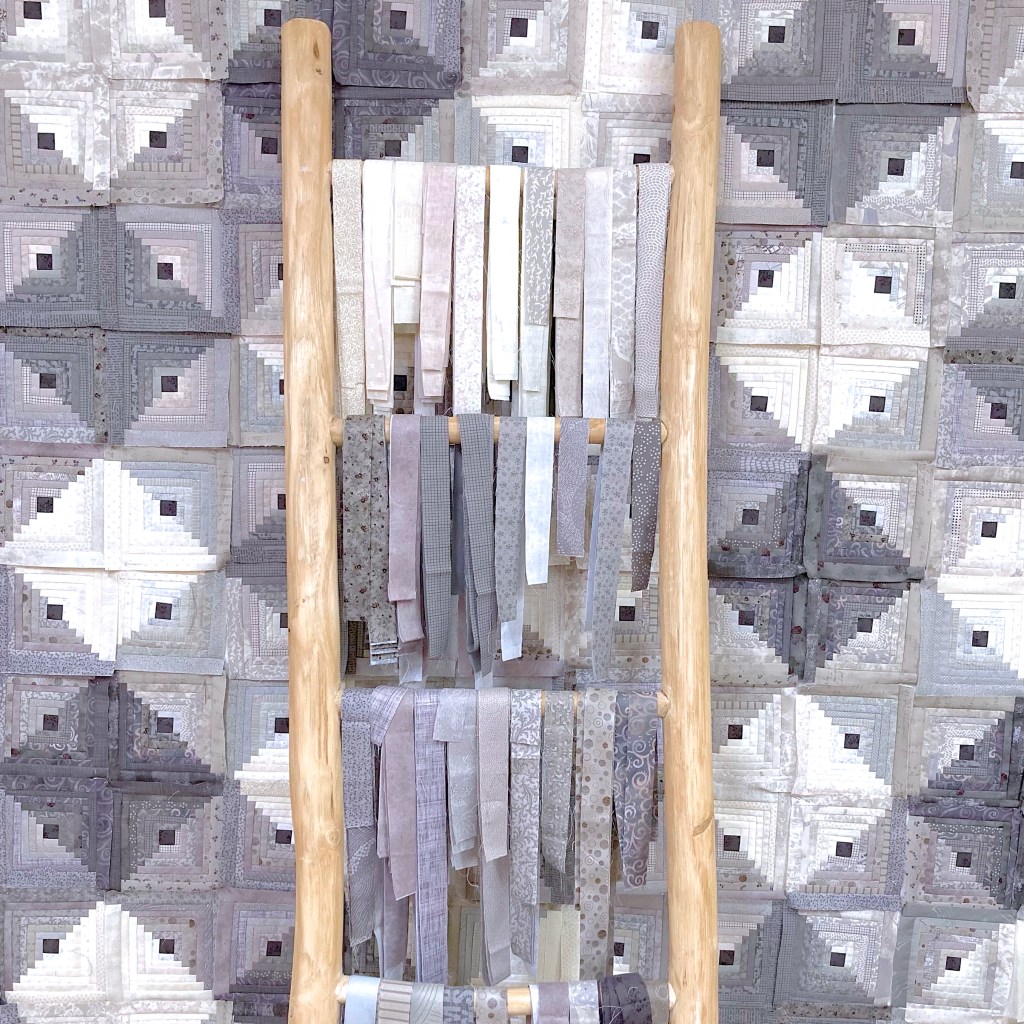
A favourite tool
One of my favourite tools is a carved ladder.
I use mine every day – something beautiful to look at but also functional.
It holds my freestanding polystyrene design boards upright.
Useful when I pull and audition fabrics for a project.
Perfect for hanging ironed strips and sorting colours.
And when we have visitors, I move it to the guest bedroom to use as a towel rack.
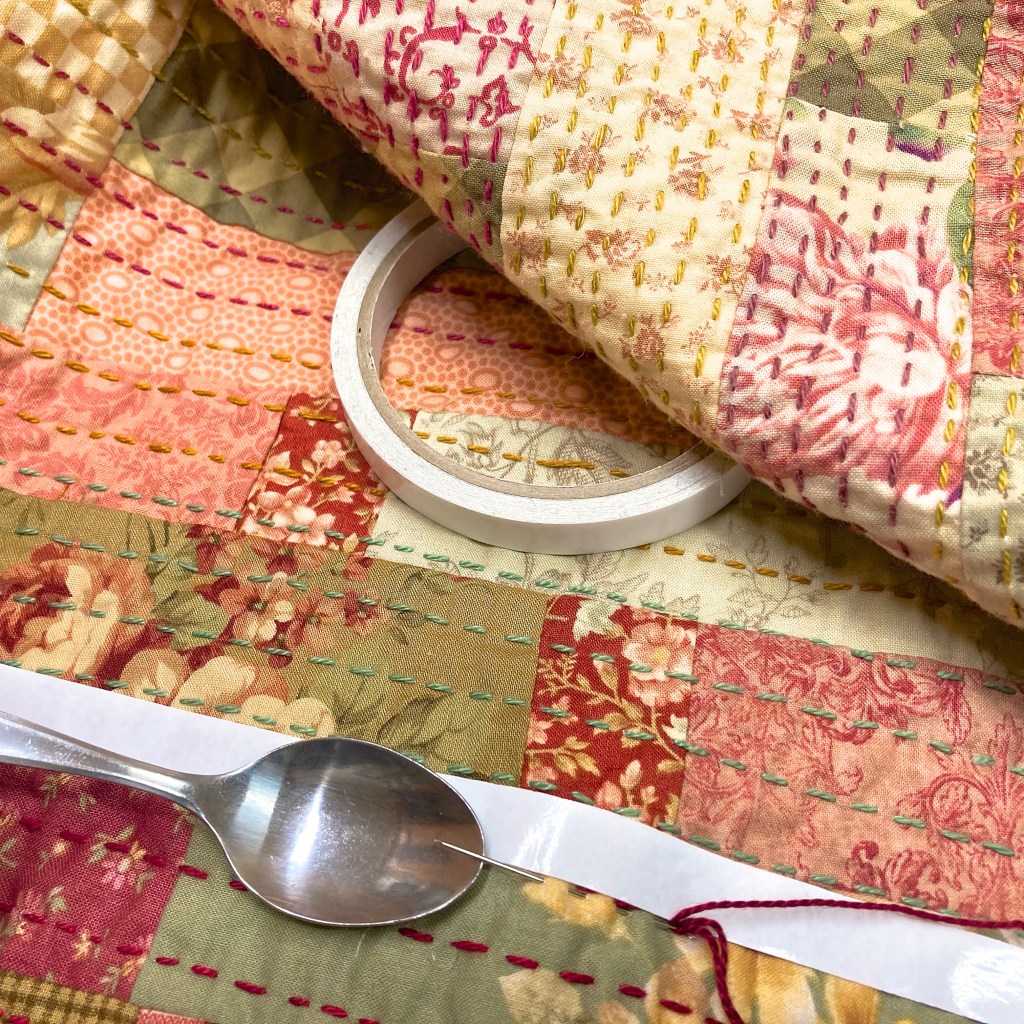
Big Stitch Quilting
A few things that I do when I do big stitch quilting:
I do not stitch the three layers together when I do the top stitching. I only stitch the quilt top to the batting.
Before I start, I secure the batting to the top with a few safety pins, just a square in the middle to start off.
Start to stitch in the middle of the quilt and go round and round.
Change thread colour every now and then.
I do the stitching on my lap in front of the TV with an old bread plank on my lap to create a flat space.
I use a strip of narrow masking tape between the rows of stitches – to help me get more or less straight stitch lines.
The stitch lines usually do not line up with the seam lines, but that is ok.
Cut batting at least 20cm wider than the quilt top. You may want to grow the quilt top as you go.
When I am done with the hand stitches, I add the backing and secure it to the batting and quilt top with hand or machine stitches.
The Kawandi and Khanta inspired quilt is a great way to use up all the scraps from previous project.
Big stitch – favourite tool
A teaspoon is one of my best quilt tools.
I load about 3 or more stitches on my needle and then lift the needle point up with a teaspoon to pull the thread through.
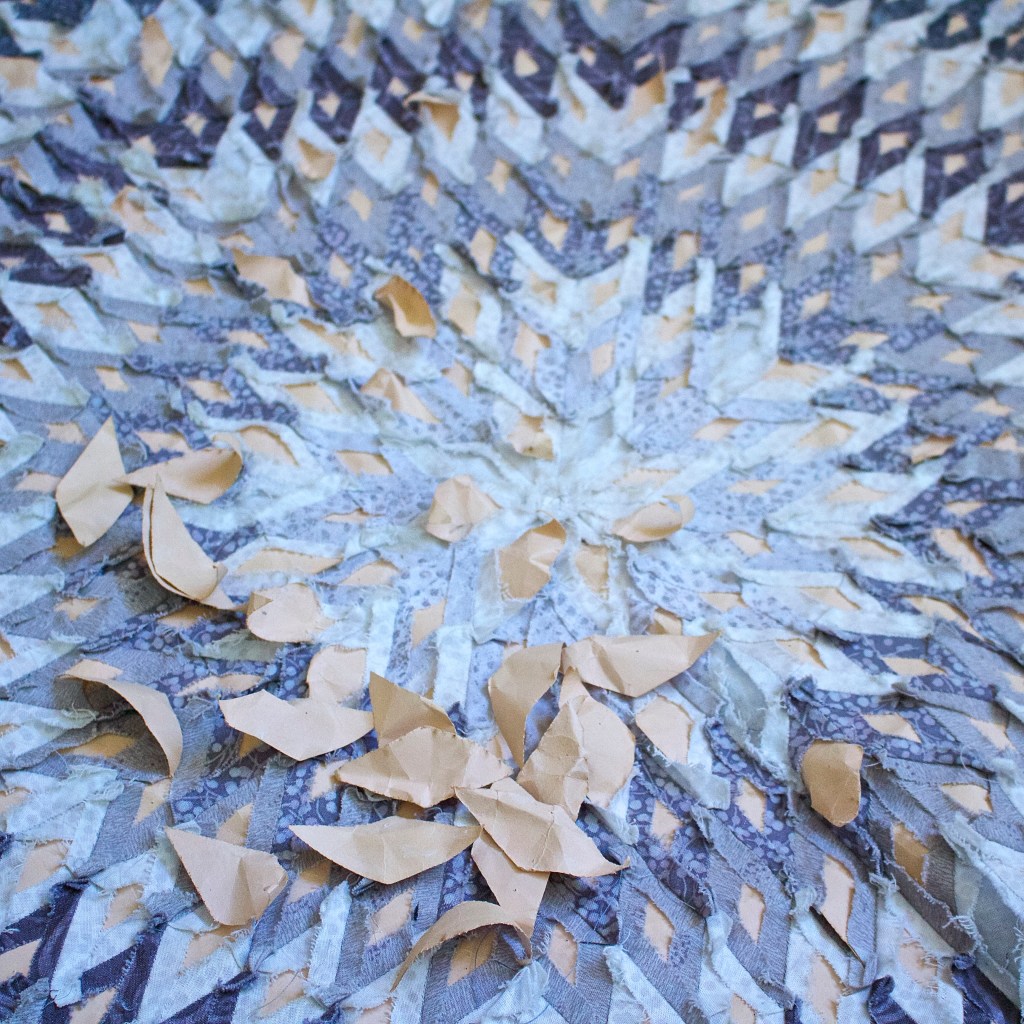
Recycled silk
Recycled silk and sari fabric are ideal for making a Yo-yo or Suffolk Puff throw.
I fuse a light stabiliser to the silky fabric – to give the puffs more body and strength.
Silk scraps
After I made the Yo-yo throw, I used all the silk scraps to make reusable gift-wraps.
A gift is very special when wrapped in a silk cloth.
My best tip to work with the silky fabrics is to iron on a light stabiliser – to give the fabric a bit more strength.
Suffolk Puffs or Yo-yos
I use graph paper and double sided tape when I join Yo-yos or Suffolk Puffs – to make sure that I get the first few rows straight.
The double sided tape keeps the puffs in place while I’m stitching.
Paper Piecing
When I do English Paper Piecing and run out of paper pieces, I simply pop out a few glued paper pieces – from the quilt in progress.
Give them a good ironing to flatten, and re-use it.
Saves paper and money.
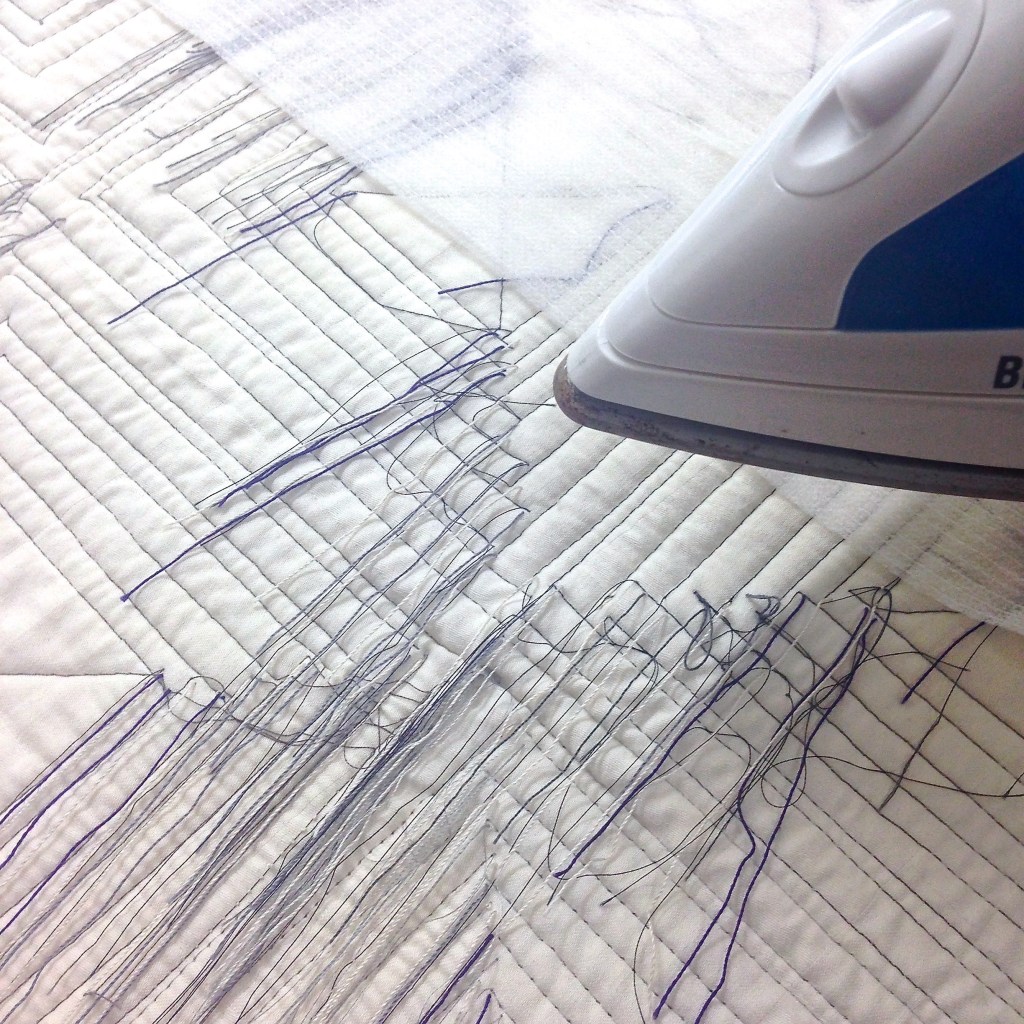
Loose threads
This is my way of dealing with all the loose threads:
I pull the threads to the back and lightly comb them with a soft brush before I fuse a thin stabiliser onto the entire back of the quilt – to trap the threads.
Use a press cloth between the iron and stabiliser.
This way saves a lot of time and gives the quilt an extra layer before I add the backing.
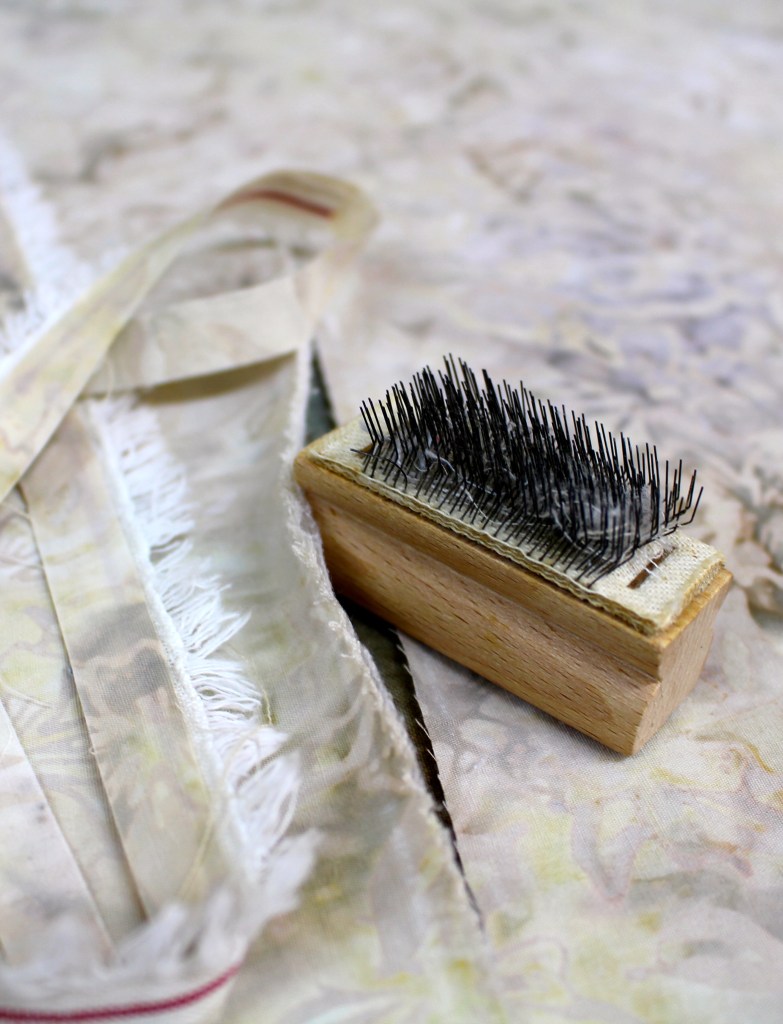
A favourite tool
I use a brush to fray the edges when I do raw edge appliqué.
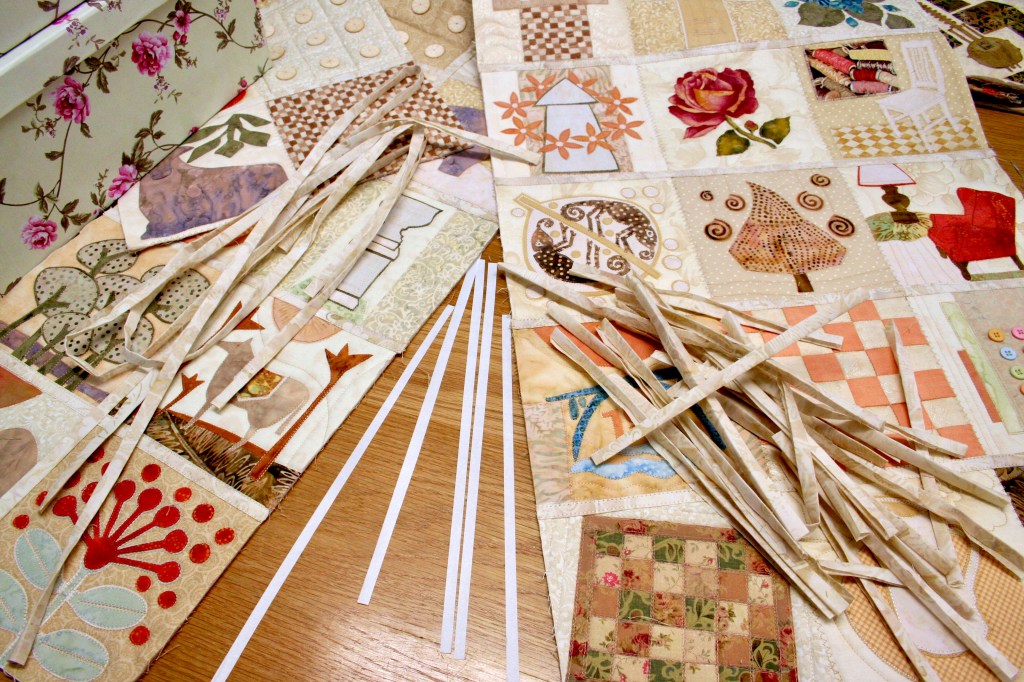
Joining blocks with sashing
I like to join individual collage blocks with sashing strips – after I have zig-zagged the blocks together.
Cut narrow strips of fabric sashing, fold and iron it to the width you require.
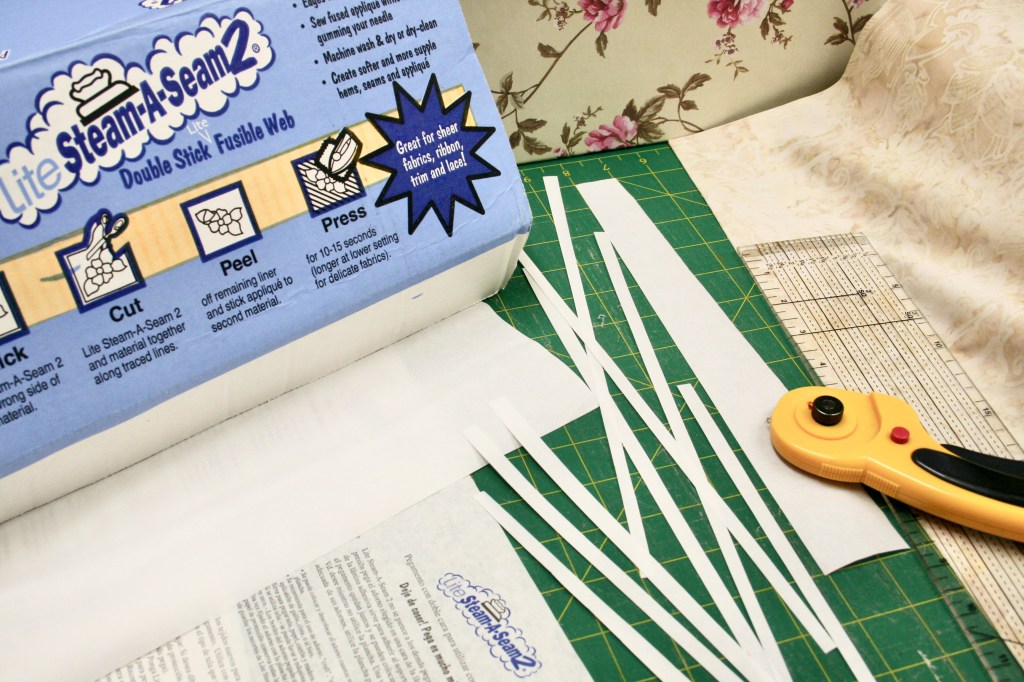
Fusible web strips
Cut Steam-A-Seam-2 strips a fraction narrower as your folded fabric strips.
Join the blocks
Join your collage blocks with zig-zag stitch.
Fuse and stitch the strips
Iron and fuse the Steam-A-Seam strips over the zig-sag stitched line between the blocks.
Remove the paper from the Steam-A-Seam strips.
Iron and fuse the folded fabric sashing strips to the sticky strips.
Stitch down the fabric strips on both sides – left and right.
Burning the edges
The way I burn the edges:
Outside, on a clothes rack with pegs.
Not on a windy day.
Always have a wet cloth handy – to stop the burning when it looks just right.
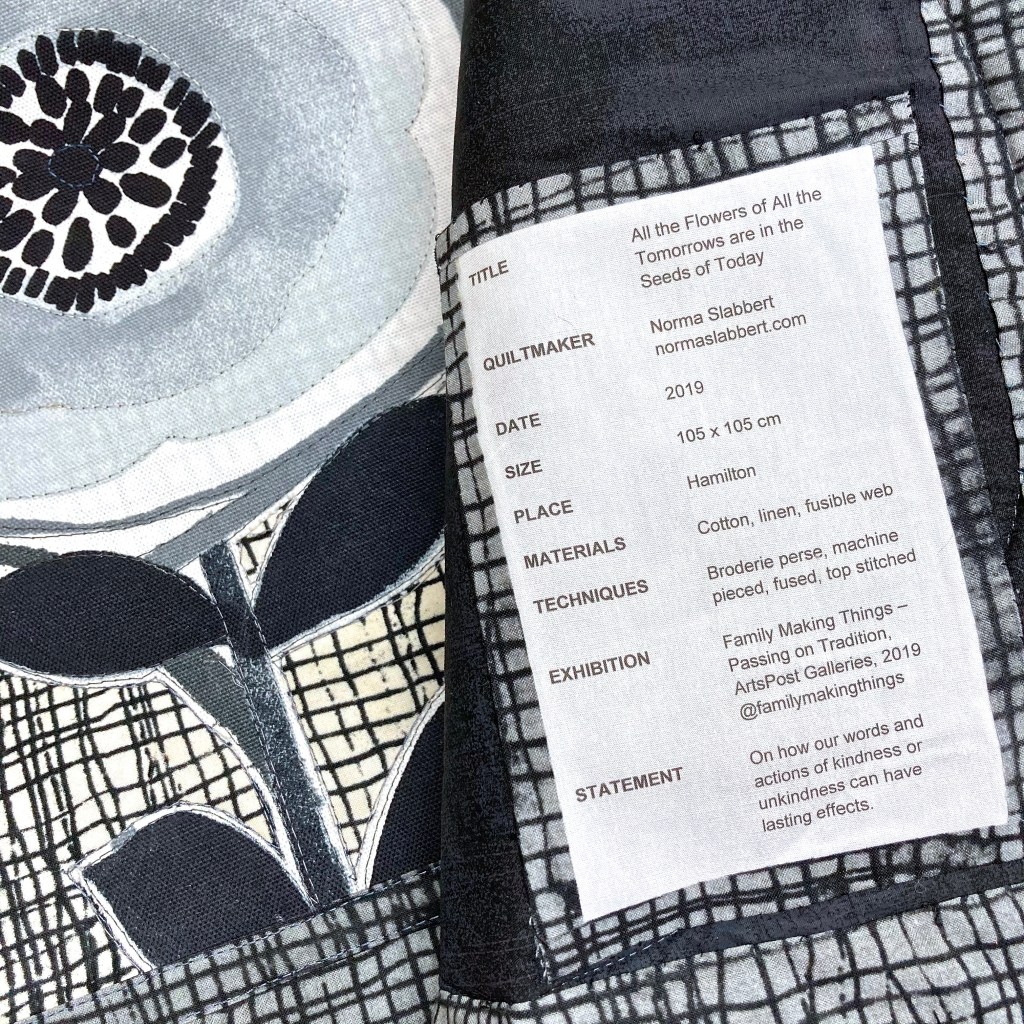
Document and label quilts
I create a blank master template for my quilt labels and save it in Word.
Using a master label creates uniform quilt labels for your quilt collection.
Complete and print your fabric label.
I use paper-backed fabric for an inkjet printer – PhotoFabric (TM).
I fuse my labels to the back of my quilt – before I stitch it.